Connect Vertex AI Workbench Notebooks
You can use the Tecton SDK in a Vertex AI Workbench notebook to explore feature values and create training datasets. The following guide covers how to configure your notebook cluster to run on a Dataproc kernel for use with Tecton. If you haven't already completed your deployment of Tecton with Dataproc, please see the guide for Configuring Dataproc.
Terminated notebook clusters can be cloned to create new notebook clusters. Cloning a previous notebook cluster is often the easiest way to recreate a cluster. Otherwise, follow the instructions below to create a notebook cluster from scratch.
Prerequisites
To set up Vertex AI with a Dataproc cluster for Tecton, you need the following:
- An GCP account with an IAM role that has access to your data
- A Tecton User (your personal account) or a Tecton API key (obtained by creating a Service Account)
Setting up a Vertex AI Workbench with Dataproc
Create a new Dataproc cluster.
-
Install the gcloud cli on a local machine.
-
Run the following command from gcloud
-
Set CLUSTER_NAME to the name you would prefer for your notebook cluster
-
Set GCP_PROJECT to the name of your gcp project
-
Note the GCP_REGION being used, and modify if your deployment is in another region
-
When working with production data, you may need to increase number of worker nodes or select a larger machine type
export CLUSTER_NAME="tecton-notebook-cluster"
export GCP_PROJECT="my-project"
export GCP_REGION="us-west1"
gcloud dataproc clusters create $CLUSTER_NAME \
  --region $GCP_REGION \
  --project $GCP_PROJECT \
  --master-machine-type n1-standard-4 \
  --worker-machine-type n1-standard-4 \
  --image-version 2.1-debian11 \
  --properties=^#^spark:spark.jars.packages=io.delta:delta-core_2.12:2.3.0#spark:spark.sql.extensions=io.delta.sql.DeltaSparkSessionExtension#spark:spark.sql.catalog.spark_catalog=org.apache.spark.sql.delta.catalog.DeltaCatalog#spark:spark.jars=gs://tecton-sample-data/jars/tecton-udfs-spark-3.jar \
  --optional-components JUPYTER \
  --enable-component-gateway
-
Create and Configure JuypterLab
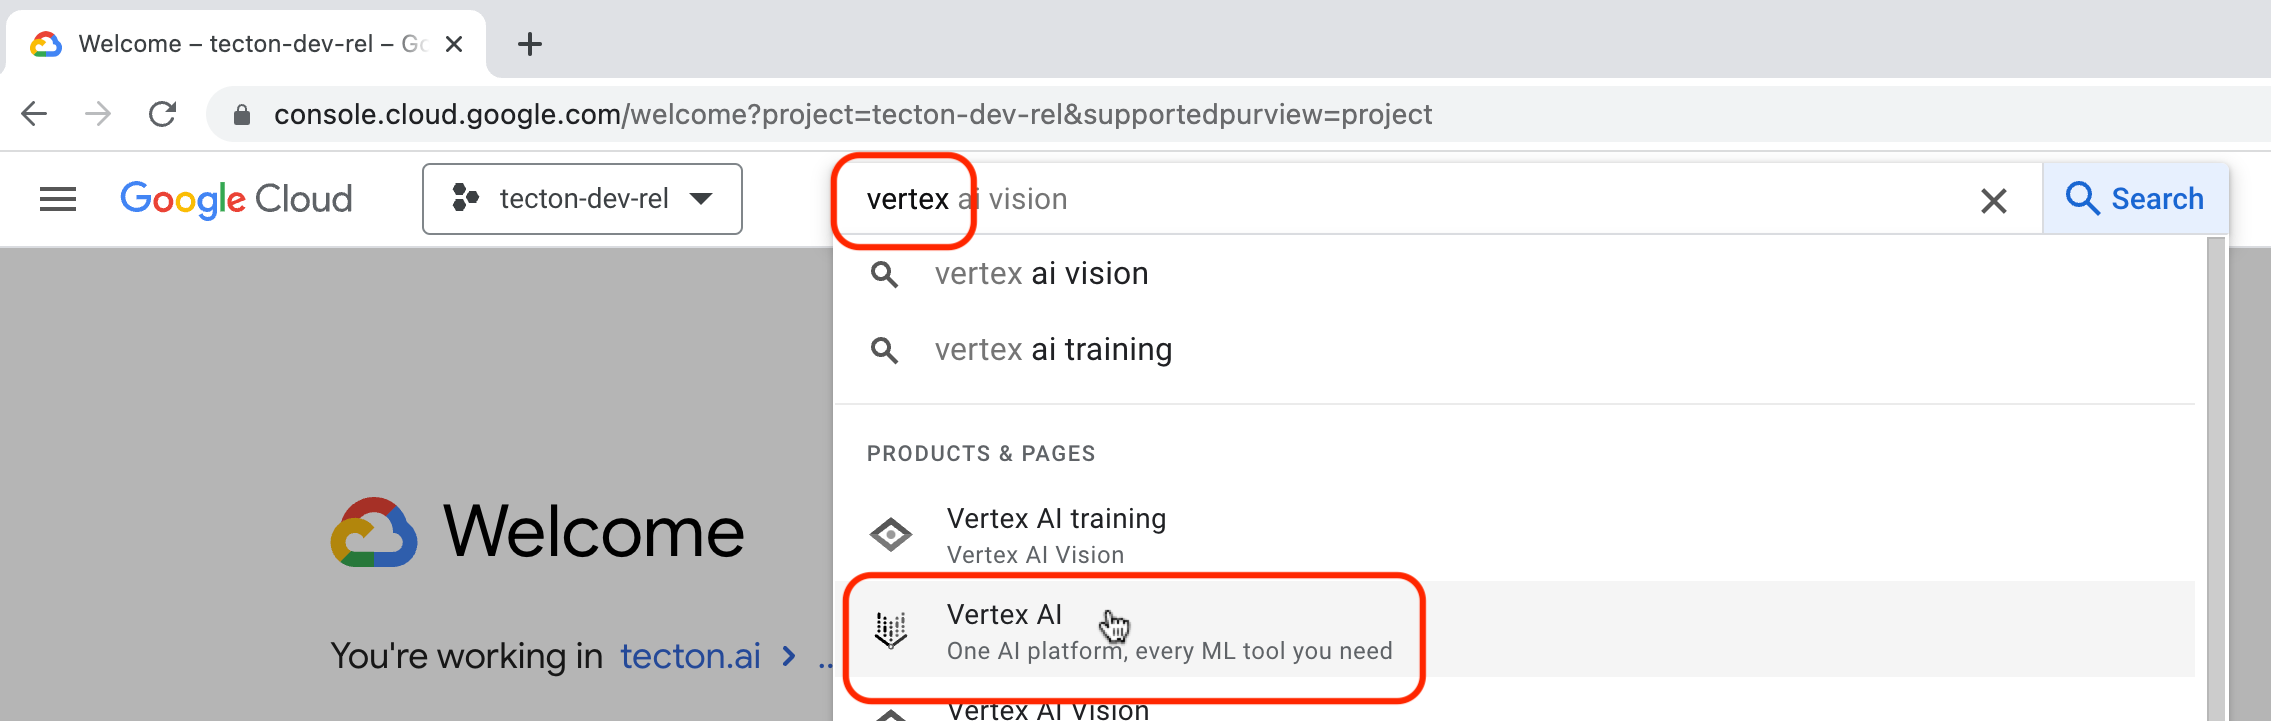
GCP provides a managed JupyterLab environment through Vertex AI. This can be used to run notebooks that interact with Tecton on a Dataproc kernel. Start by finding the Vertex AI offering within your GCP project.
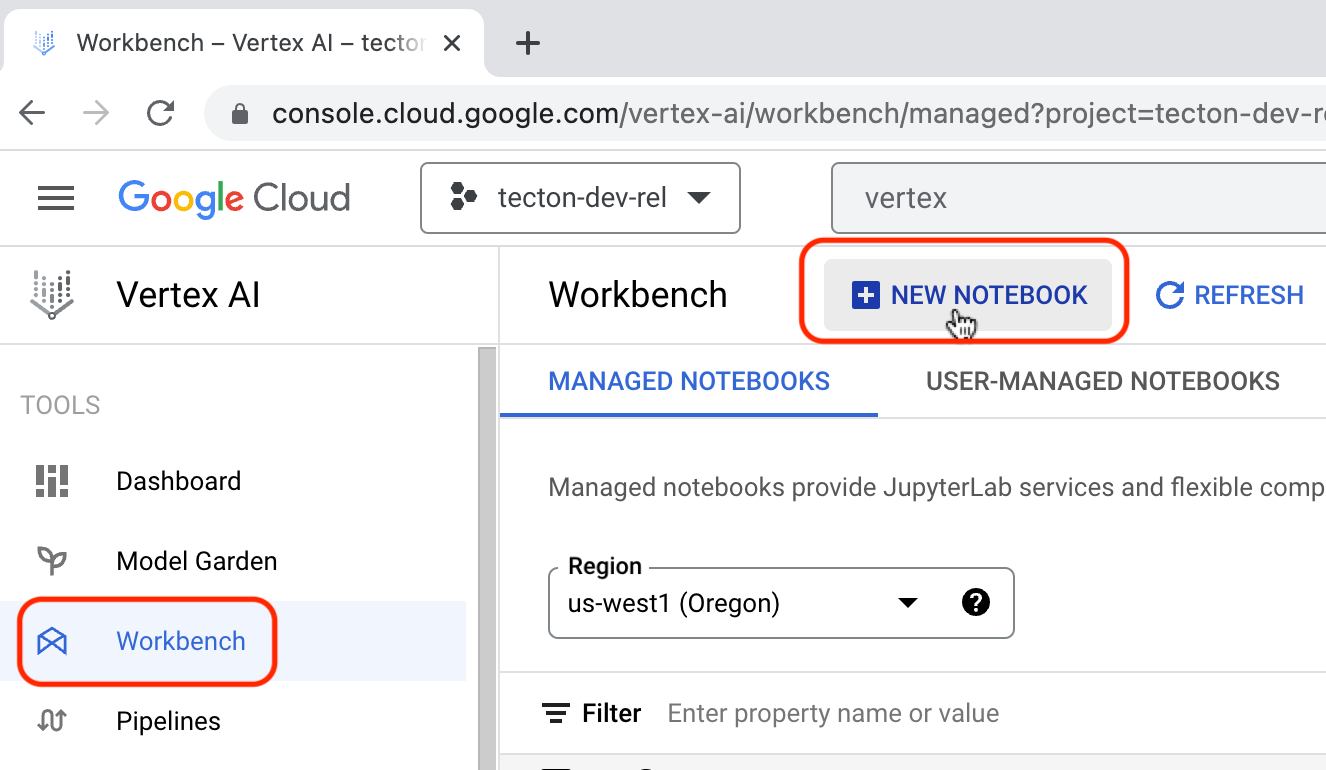
On the righthand-side menu, select Workbench, then select the Managed Notebooks tab, and click on the NEW NOTEBOOK button.
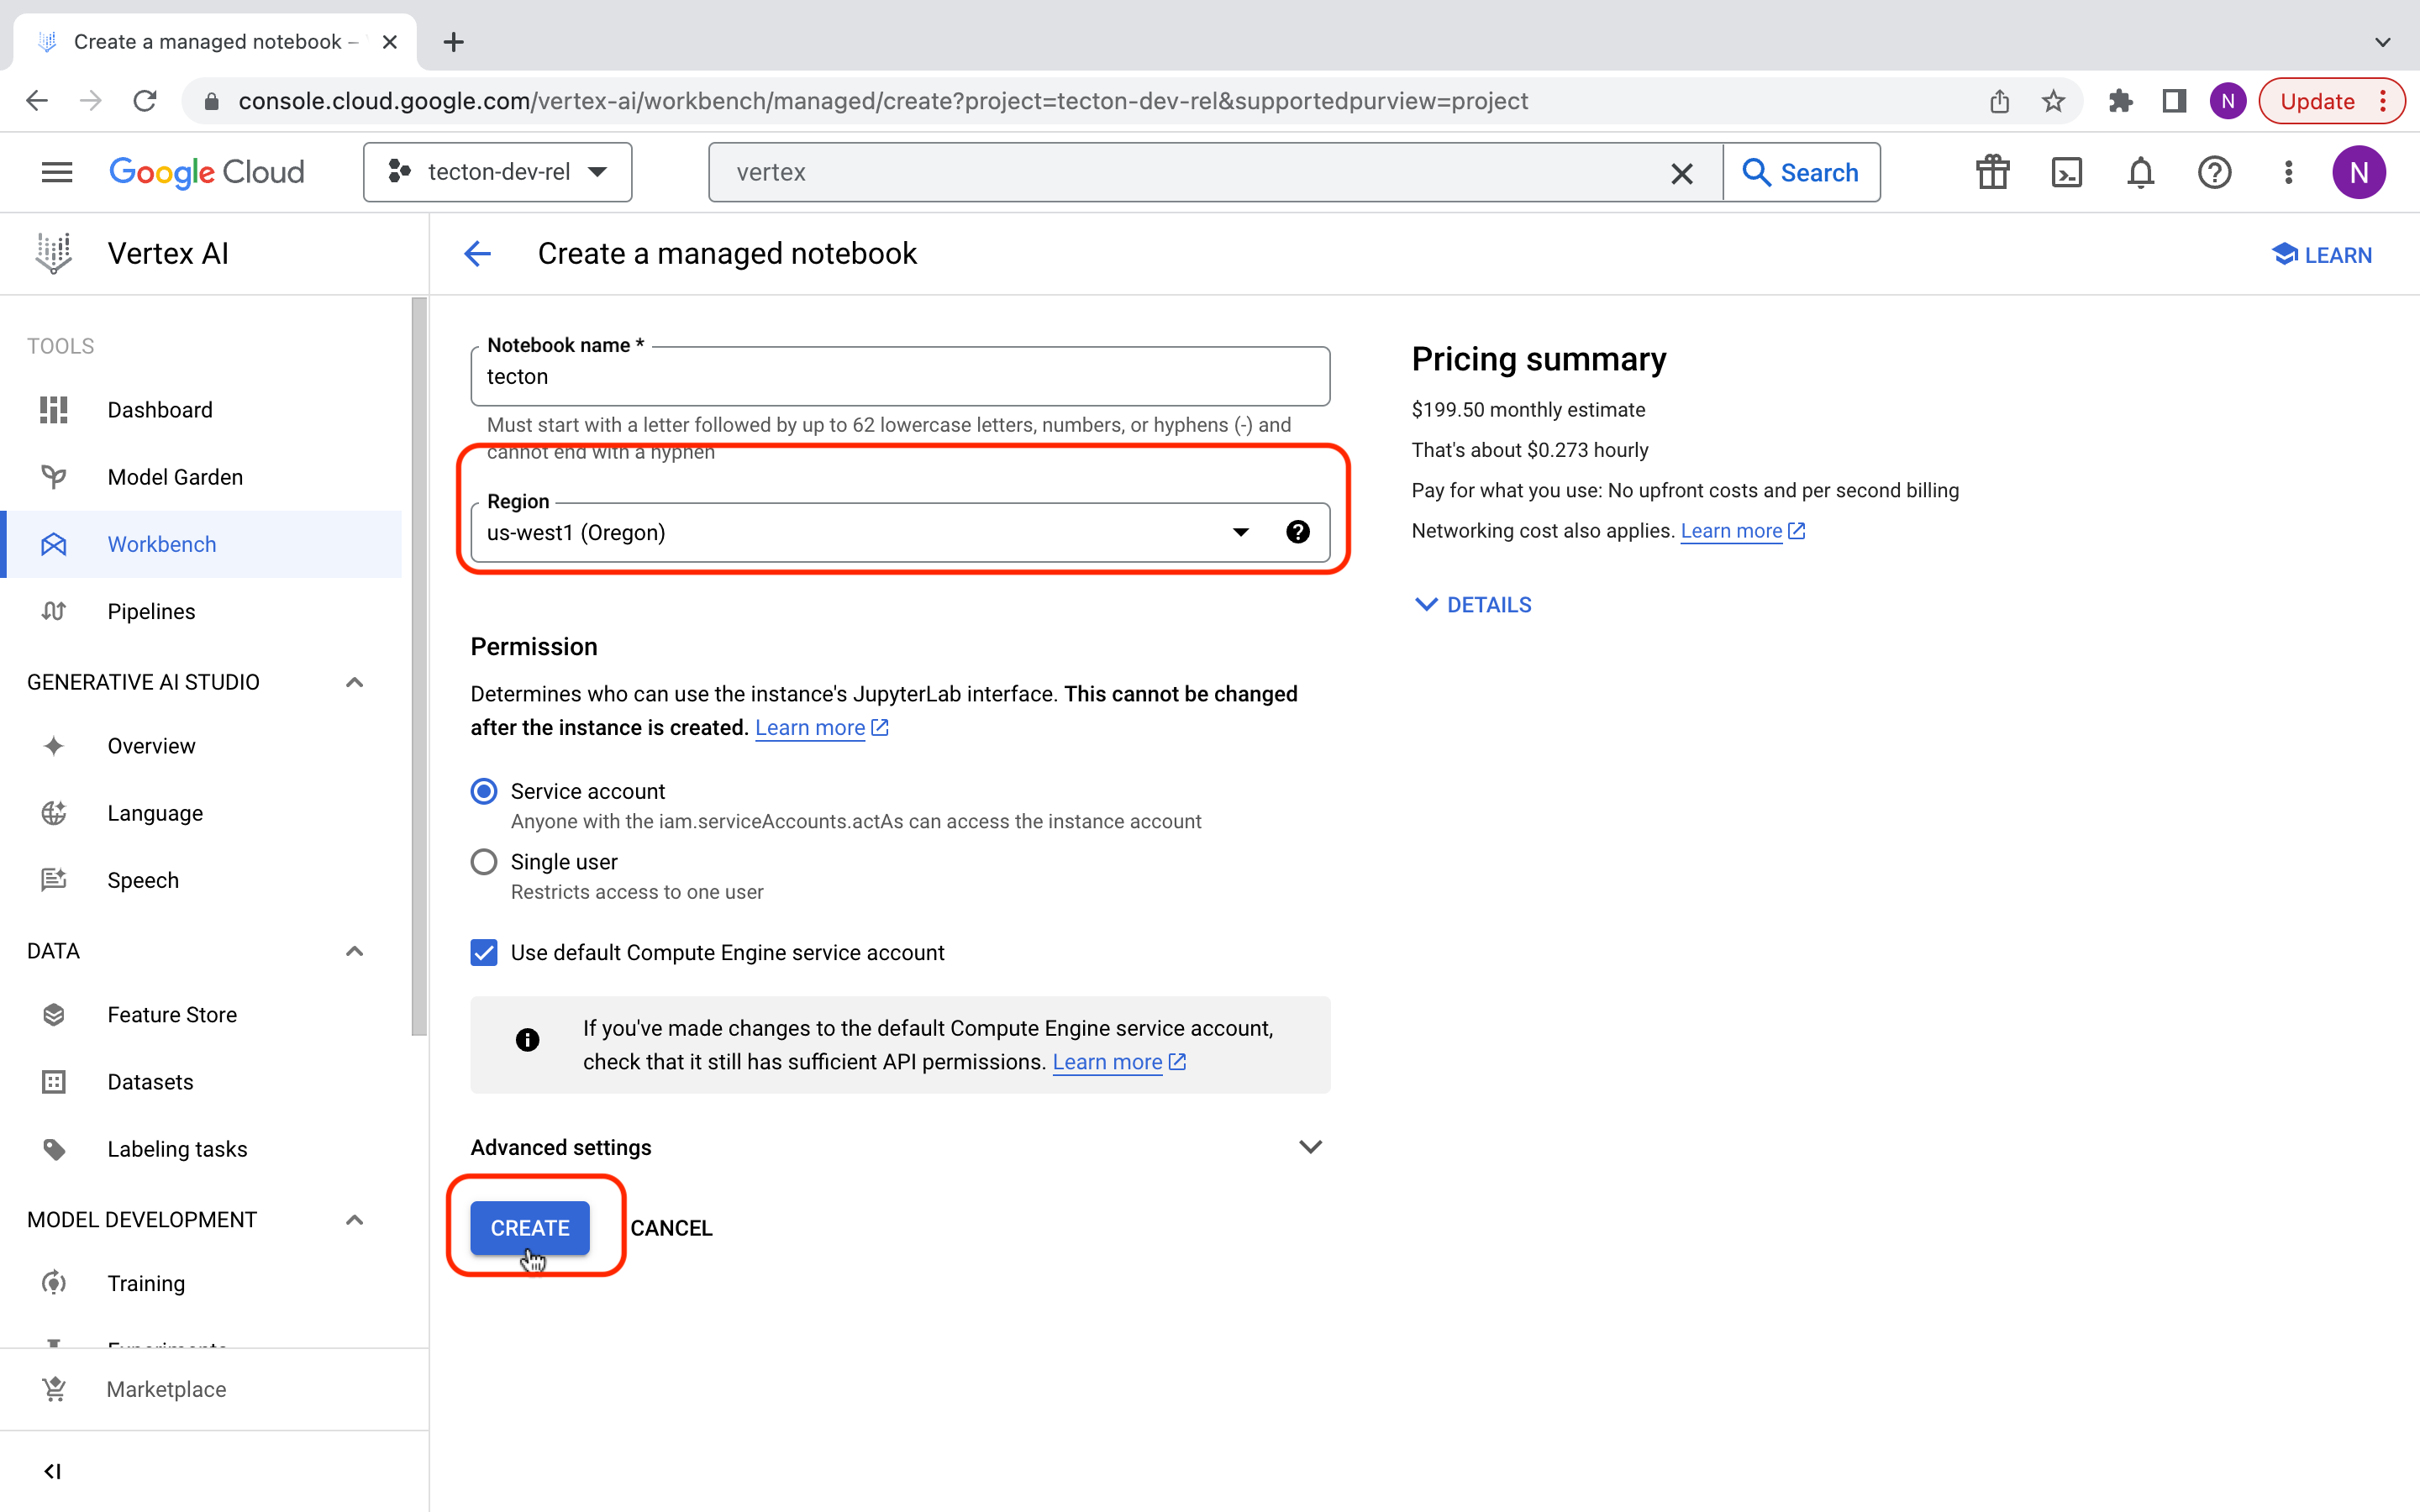
The Notebook name can be anything you wish, but make sure the Region is the same region your Dataproc cluster is in. Select CREATE
Run Example Notebook
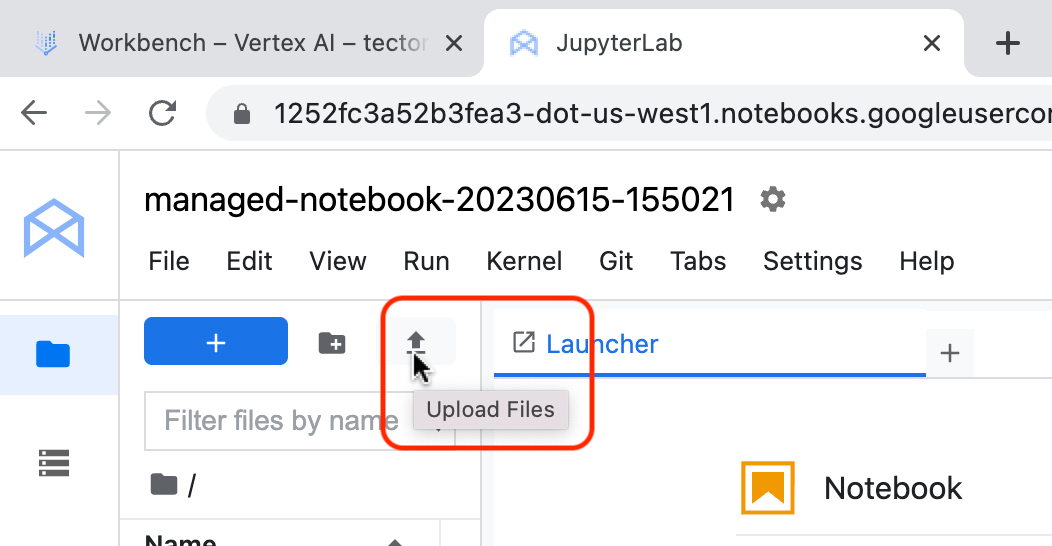
We have provided a sample notebook here, select OPEN JUPYTERLAB next to the notebook that was just created. Once in JupyterLab, select Upload Files and upload the example notebook.
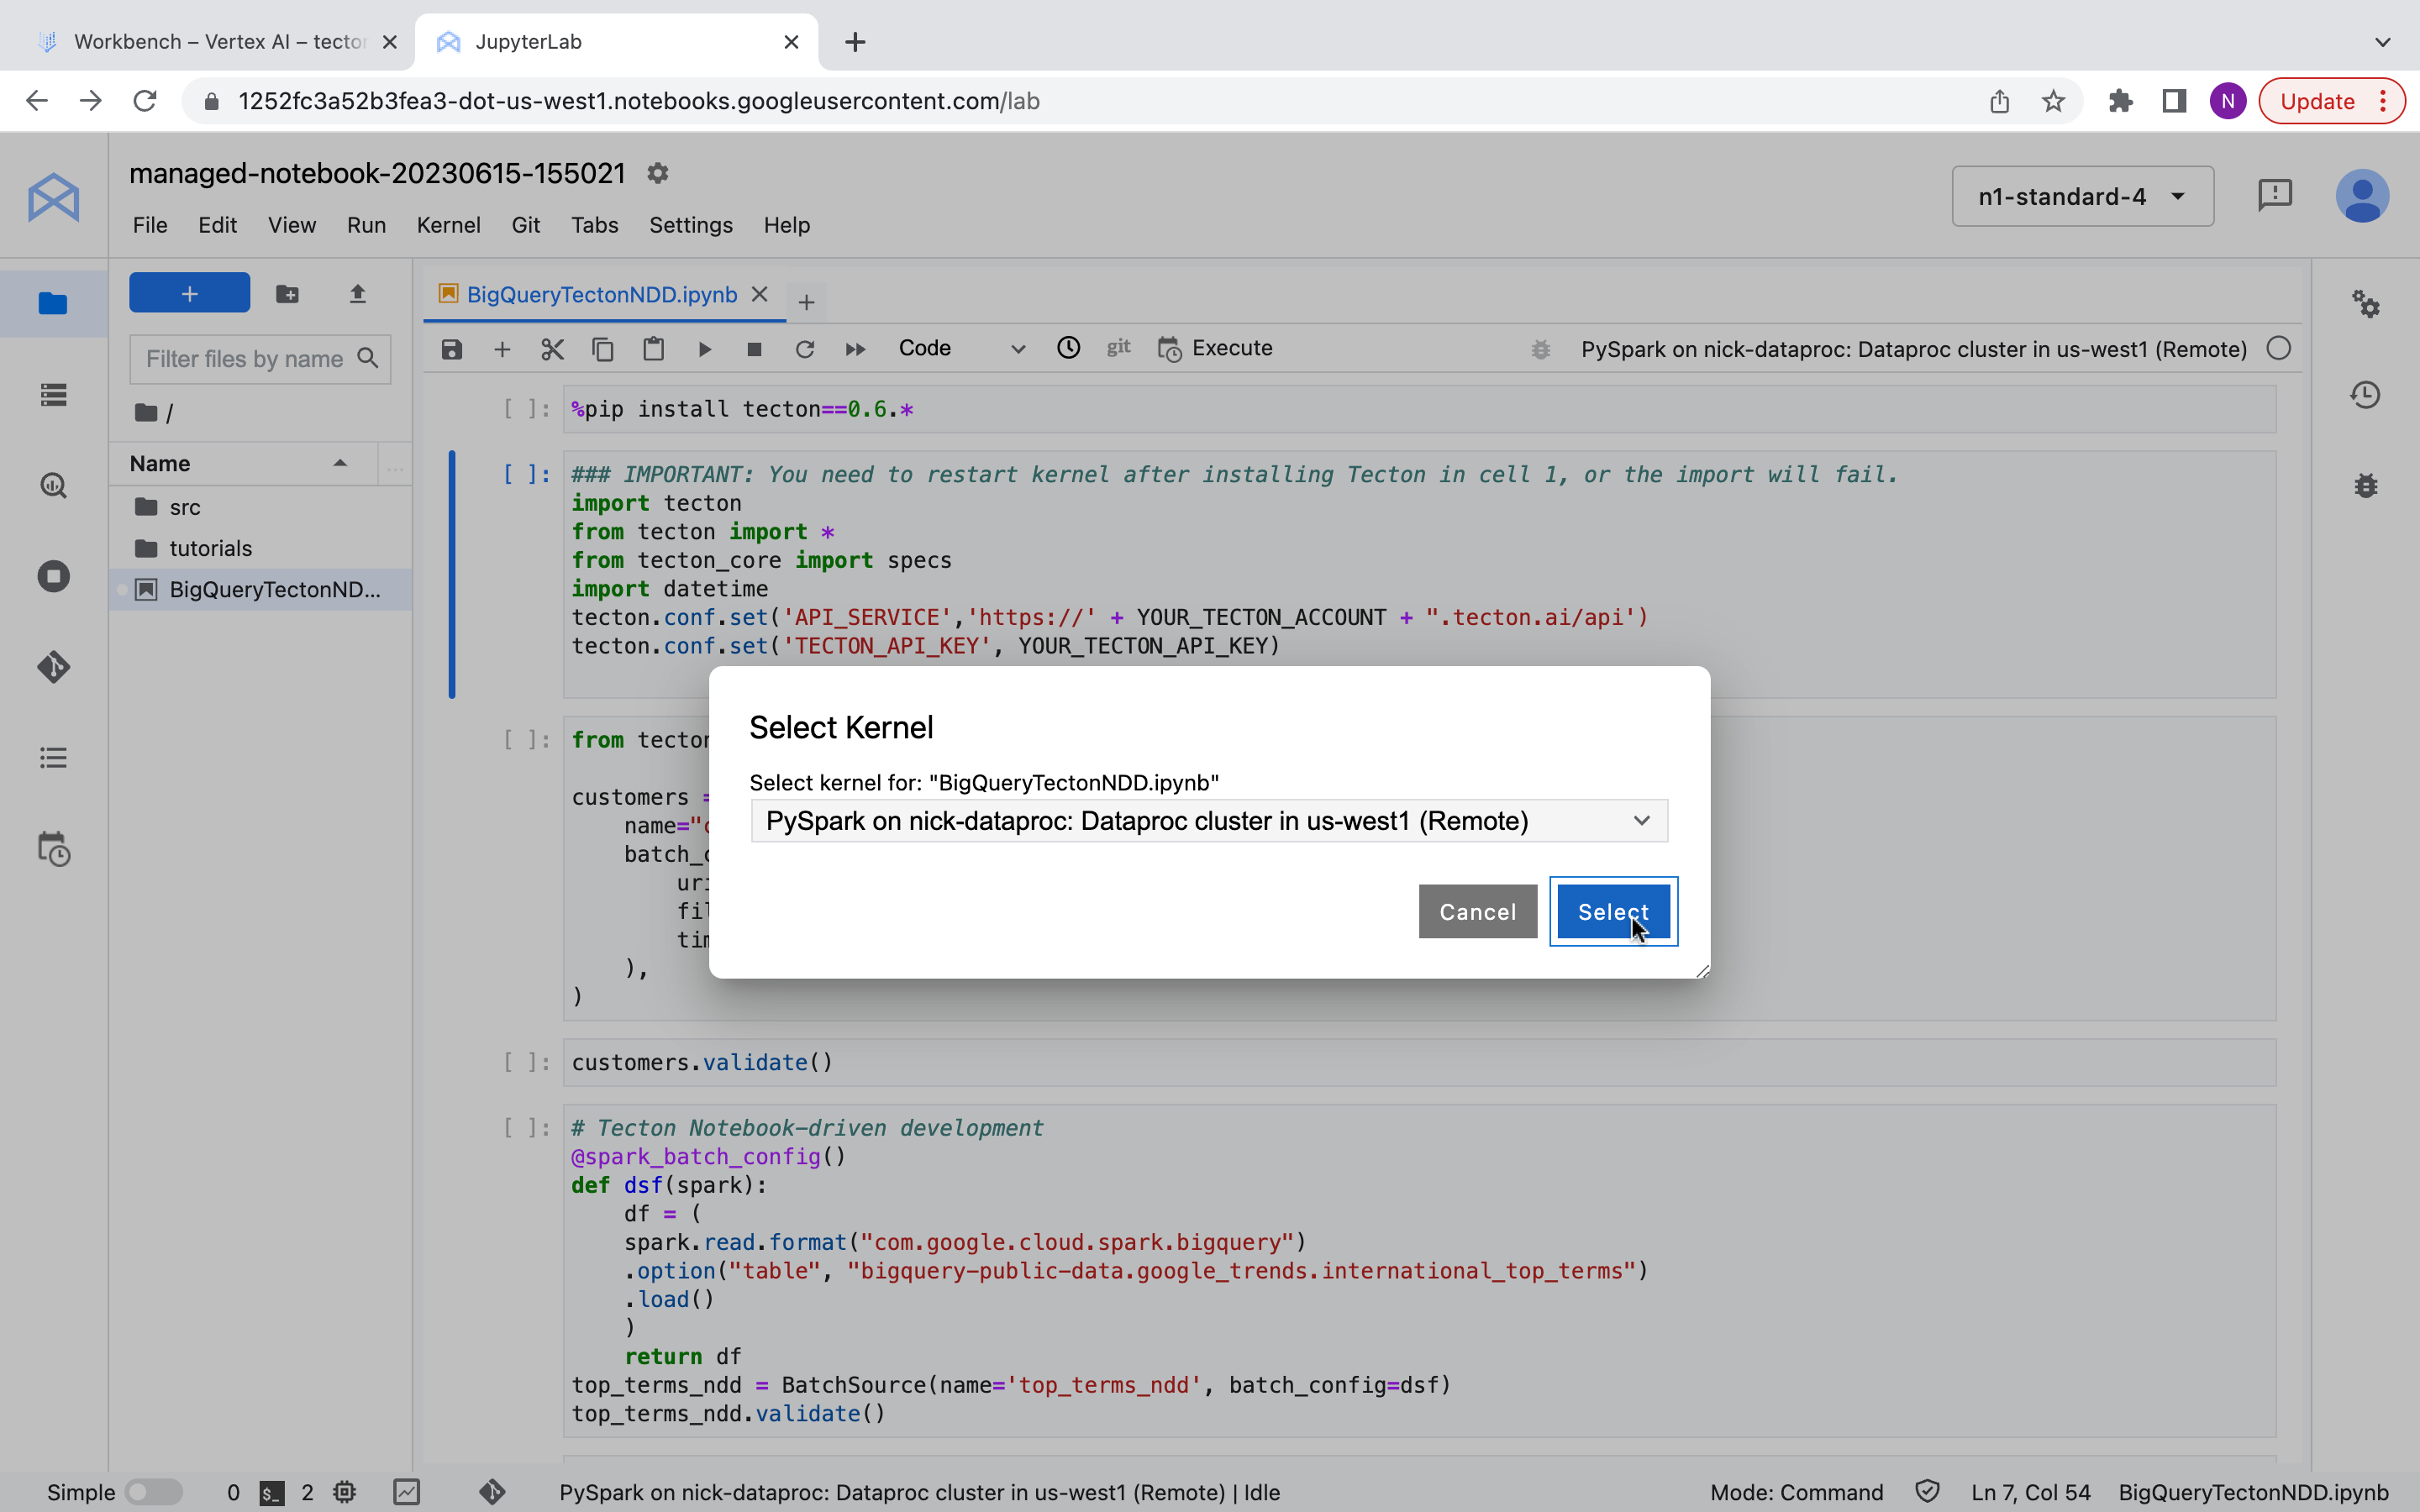
Make sure that the example notebook is running PySpark on the Dataproc cluster just created by selecting Kernel from the top nav bar and clicking “Change Kernel”.
Authenticate to Tecton Account
Option 1: User Credentials in Notebook Session Scope
User credentials configured using tecton.login() are scoped to the notebook
session, and must be reconfigured when a notebook is restarted or its state is
cleared. User credentials override any credentials set in
Option 2: Service Account Credentials in Notebook Session Scope.
To authenticate as a user, run the following in your notebook, replacing
"https://example.tecton.ai" with the URL of your Tecton instance:
tecton.login("https://example.tecton.ai")
Then follow the directions to open the login link in your browser, sign in to the Tecton instance as your user, and copy and paste the authorization code from the Identity Verified web page back into your notebook's input box. Please be aware the authorization code is one-time use only.
Note that get_online_features requires Service Account credentials to call the
online store. If you want to use get_online_features, please follow
Option 2 or
Option 3 to also
set Service Account credentials.
Option 2: Service Account Credentials in Notebook Session Scope
Service account credentials configured using tecton.set_credentials() are
scoped to the notebook session. They must be reconfigured whenever a
notebook is restarted or its state is cleared. They override credentials set in
Option 3: Service Account Credentials in AWS Secrets Manager.
Prerequisites
Please have a Tecton Service Account already set up (and have its API Key secret value accessible).
If you don't have one, create a new one using these instructions.
Set API Key in Session
To authenticate as a Service Account, make sure you have its API Key secret
value, and run the following command in your notebook, replacing <key> with
the API key value, and "https://example.tecton.ai/api" with the URL of your
Tecton instance:
tecton.set_credentials(tecton_api_key=<key>, tecton_url="https://example.tecton.ai/api")
Appendix
Create a Tecton Service Account
If you need to create a new Tecton Service Account, you can do so using the Tecton CLI or the Tecton Web UI.
Using the CLI
Create a Service Account with the CLI using the
tecton service-account create
command.
Using the Web UI
Create a Service Account with the Web UI using these instructions