Set Up Tecton
Setting up Tecton involves configuring your data platform, connecting to data, selecting an online store, and more. Follow the guides below to get started with Tecton.
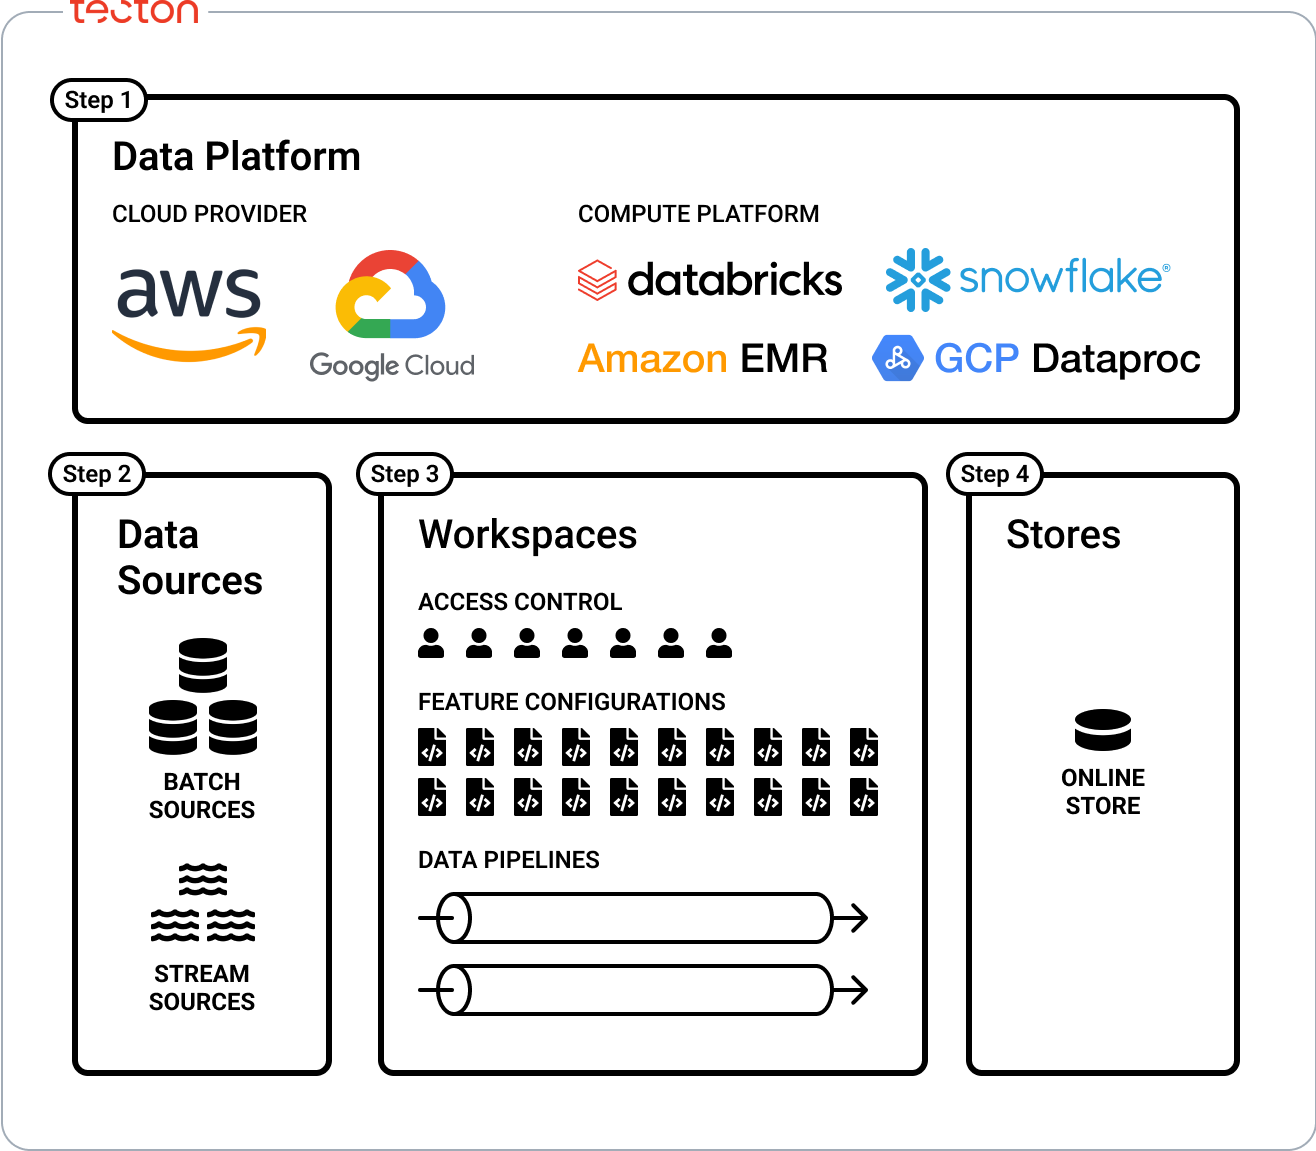
1. Connecting to a Data Platform
Choose your Cloud Provider and Region. Tecton can be deployed into any AWS or GCP region. (Azure coming soon.) Then, connect to your compute platform. Tecton supports Databricks, EMR, and Snowflake as data platforms. Follow the guide for your platform to connect Tecton.
2. Connecting Data
Tecton supports connecting to various data storage options such as S3, Redshift, Snowflake, and more. See Connecting Data to configure access to your data.
3. Set Up and Configure Your Workspace for Development
Workspaces are remote environments where definitions from a repository are applied and turned into managed data pipelines and services. Access control is also managed at the workspace level. See Creating a Workspace and Adding Users to the Workspace
4. Selecting an Online Store
DynamoDB and Redis can be used as an online store to serve features in real-time. See Selecting your Online Store to determine which store is right for you.
Additional Administrative and Development Setup
The following guides cover general Tecton setup:
- Installing the Tecton CLI: The Tecton CLI is used to interact with Tecton. Install it to get started with development.
- Creating a Feature Repository: A feature repository is where you define your features. This guide shows how to create one.
- Connecting CI/CD: We recommend setting up CI/CD to automatically deploy changes from your feature repository.
Next Steps
After following the initial setup guides, you're ready to start Defining Features in Tecton!